Industrial Practice
Samples of Design
Templates
Designs ready to be mounted
My account of the job
I was just given by Michael Cumming
I have just been approached by Michael Cumming to design a
small office at the back of a listed building with a very high ceiling and a gorgeous
Georgian window. Apart from being a small (near enough square box room), the
wiring and pipe work is showing instead of hidden inside the walls.
Lots of unused computers with screens and key boards
Before painting I cleared the room of all the furniture's, cleaned the floor, walls and skirting as it was all very dirty. I also had to sand all parts of the room that were made of wood.
At last a completely empty room
You can now appreciate the high ceiling and the long Georgian window
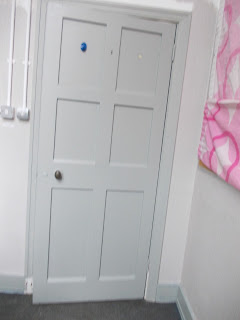
All the materials to be used are kept in the joining room. The floor was covered with old sheets to protect the carpet from any paint spillage. Masking tape was used on the skirting board to separate the wall paint from the skirting paint splashes. An artwork was made for the large pin board behind the door and covered to prevent paint splashes. To keep cost down the client and I agreed to painting over the chipboard wall covering rather than removing it.
All wood work been sand down
A risk assessment was carried out to determine a potential for accidents. The entrance and exit had to be kept clear at all time. Unfortunately the room’s entrance is through a communicating door which leads to another room. This could pose a problem for incoming and outgoing traffic. Also, if one the entrances was blocked, it would be impossible to exit the room as none of the windows is large enough to escape through. The radiators are all currently switched off. The main windows and doors can be left open for good ventilation. A mask and protective clothing must be worn during the sanding and painting process. Ladder training must be given before any work begins.
Health and safety issues is of paramount importance with regards to construction sites, from wearing hard hats, steel boots and making sure the scaffolding is firmly set up correctly. It is necessary to establish the duties and required equipment's to be used by each site person and account for all staff at all times in case of an emergency. Staff is advised to get assistance or use the right machinery when carrying heavy goods, protect their eyes from any dust, wear ear plugs for high level of noise and be safe at all times by checking and having safeguards on all high- pro machinery.
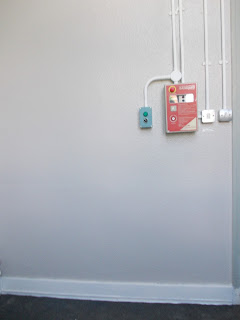
The pipe and plugs on the wall will be difficult to paint round
I then started painting the colour chosen for the room which will tie in with the furniture's and carpet. I am lucky as most of the furniture's I’ll be re-using was already located in the room.
Color's chosen for the wall (light Brown)
Painting just started (1st coat)
At this stage only one coat was applied to the walls. Due to
health and safety ladders was restricted until you were ladder trained. This
caused a lot of problems an extending pole needed to be used but was not
applying the very top evenly. The painting process was slowed down due to pipe
work being on the outside bottom on top of skirting and on three of the four
walls. Not much space between the walls and the pipes so excess paint from the
wall colour was accidental placed on the pipe work.
Preparing the area
Getting into those corners
Second coat of paint had been applied. No sign of the ladder
just yet or training so the top was left. The wood undercoat painting began
skirting boards and door. At this stage I decided to change the finish colour
for the pipe work from antique white to white. The floor was covered before
painting, skirting masked and window open to ventilate. At the end of the day
the room is cleared window closed and equipments put away.
Skirting and door been undercoated
I intend to sand and re-paint each item of furniture's. After testing out the pva glue technique I decided against it due to difficulties with drying. Instead, I decided to paint directly on the wood as I could achieve the desired finish with this technique.
I decided not to go ahead with this item of furniture due to
it being too large of a piece
Recycle furniture being sand down Good old wipe down
Recycle furniture’s
All the recycle furniture's was allocated and put out of the
way of the main entrance. Each item of furniture’s wiped and sanded down,
tested with pva glue to see the extent of what paint was going to be used and
how well the material of the furniture's take to the paint. The pva technique was not needed in the end
the acrylic paint was sufficient to cover the area needed.
The pin board with the template artwork was covered over to
protect from paint splashes. A ladder
trained personal assist me by masking an even line by using a spirit level to
create a straight line on the wall to indicate where the paint on the walls is
going to end also assemble my blind and attach it to the window panel.
Another coat of paint as been applied
When applying paint to the skirting as a guide masking tape was used very close to the skirting preventing any paint touching the carpet. The window was cleaned once again rub and wiped down. Brilliant white under coat was applied to give you that clean line fresh look.
The pipework is now having attention (1st under coat)
With all the major painting job done all was left was touching up the paint work in certain areas such as between the pipe work and the skirting, door frame to the wall, around the pin board and right up to the masking tape height on the wall.
The painting area been cleared, inspection of the painting job noted and all masking tape removed.
Techniques was used to give different effects
A vanish was applied to give a glossy look
The accessories was carefully selected to compliment the decor such as the long elegant beige evening grown with
different light colours materials and texture, placed on a long manikin. The short silver
stand that hold the lamp shade on top of the dark red and black desk, computer
standing on the grey carpet to expose the dark and light grey colour against the antique white skirting board. The
beige blinds against the white window frame directly under the cream radiator.
The template fashion figures as been drawn out in different colours and details been added on to the paper. Spray painting done directly on to a large white sheet spraying through cut out templates to form different item of clothing.
Painting has been completed, furniture’s and accessories in
place.
The pin board artwork demonstrating different
item of clothing took 2 and a half day to create. First a template had to be
found, traced on to tracing paper with a very dark art pencil so that when the
tracing paper is turned over on to ordinary colour paper you just have to draw
round the images on the reserve side. The print from the tracing paper will be
pressed on to the paper. The image is now on the colour paper this is cut out
and place on the large white paper
The blind illustrating the tall elegant Georgian window
This is the easy part I found putting in place where item of
furniture's belong too.
Work in progress
I have been approach to redesign a student learning development centre. At the moment in lime and orange decor the area is well lit and much of the furniture’s and flooring will be staying. The client would prefer light and neutral colours but after a meeting with them armed with a photo shop re image of the colour scheme discovered the shades of colours chosen was much too light for the room.
One of the major problem with the area being decorated straight away it will be in consent use until the summer only after 4 pm weekdays and 12 noon on Saturdays that the work could take place. With that in mind I set about exploring the meaning of colours. Seeing it was mostly students would be using that space a understanding of colours was very important as you can see from below:
Red Passion, enhanced, Metabolism
Orange Sense of
welcoming, energy
Yellow Happiness,
positivety
Green Harmony,
Stability
Blue Peace,
relaxation
Purple Luxury,
romance
Black Power, elegance, edginess
White Purity,
simplicity
Brown
Dependability, friendliness
After going through the colours meaning I advise my client to stick to colours such as Thimble case (one of the main colours) together with Bone China, Pressed Thistle for the post, Frosted dawn for the benches and Almond white for the skirting. This will set a president for calm and relaxation.
Work in progress
Before
After (photo shop image)


.jpg)

No comments:
Post a Comment